SpringBoot集成Thymeleaf
创建项目
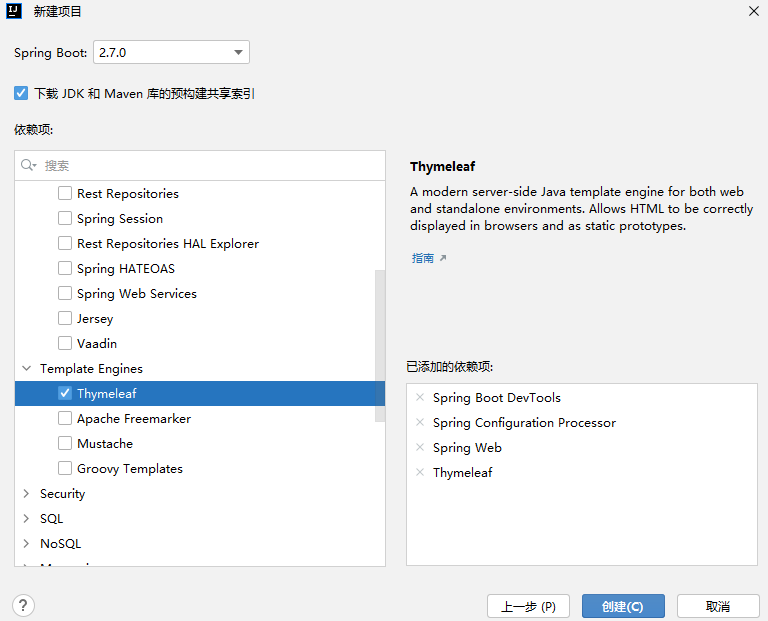
在 application.properties 配置文件中添加 Thymeleaf 的相关配置
# Thymeleaf Configuration
spring.thymeleaf.cache=false # 启用模板缓存,开发时应关闭,部署时应开启
spring.thymeleaf.encoding=UTF-8 # 模板编码
spring.thymeleaf.mode=HTML5 # 应用于模板的模板样式,Thymeleaf 必须使用 HTML5 规范
spring.thymeleaf.prefix=classpath:/templates/ # 指定模板页面存放路径
spring.thymeleaf.suffix=.html # 指定模板页面名称的后缀
这里页面存放路径是个坑,有些教程会写 classpath:/resources/templates/ 但是我实际测试是找不到模板,直接改成 classpath:/templates/ 就好了。
另外作为模板的 html 文件需要在 <html> 标签中引入 Thymeleaf 模板标签
<!DOCTYPE html>
<html lang="zh" xmlns:th="http://www.thymeleaf.org">
<head>
    <meta http-equiv="Content-Type" content="text/html" charset="UTF-8">
    <meta name="viewport" content="width=device-width, initial-scale=1, shrink-to-fit=no">
    <title>Hello</title>
</head>
<body>
Hello World!
</body>
</html>
开启热部署
在开发过程中要经常修改代码,在修改之后往往需要重启服务,有些服务需要加载很久才能启动成功,这种不必要的重复操作极大降低了程序开发效率。所以 Spring Boot 框架专门提供了进行热部署的依赖启动器,用于进行项目热部署,而无须开发人员手动重启项目。
热部署需要依赖spring-boot-devtools,刚刚创建项目的时候我们已经添加了,如果那时没有选择,那就需要手动加入到 pom.xml
<dependency>
    <groupId>org.springframework.boot</groupId>
    <artifactId>spring-boot-devtools</artifactId>
    <scope>runtime</scope>
    <optional>true</optional>
</dependency>然后在<project>标签内添加:
...
...
<plugin>
    <groupId>org.springframework.boot</groupId>
    <artifactId>spring-boot-maven-plugin</artifactId>
    <executions>
        <execution>
            <goals>
                <goal>repackage</goal>
            </goals>
        </execution>
    </executions>
...
...
在 iDEA 设置
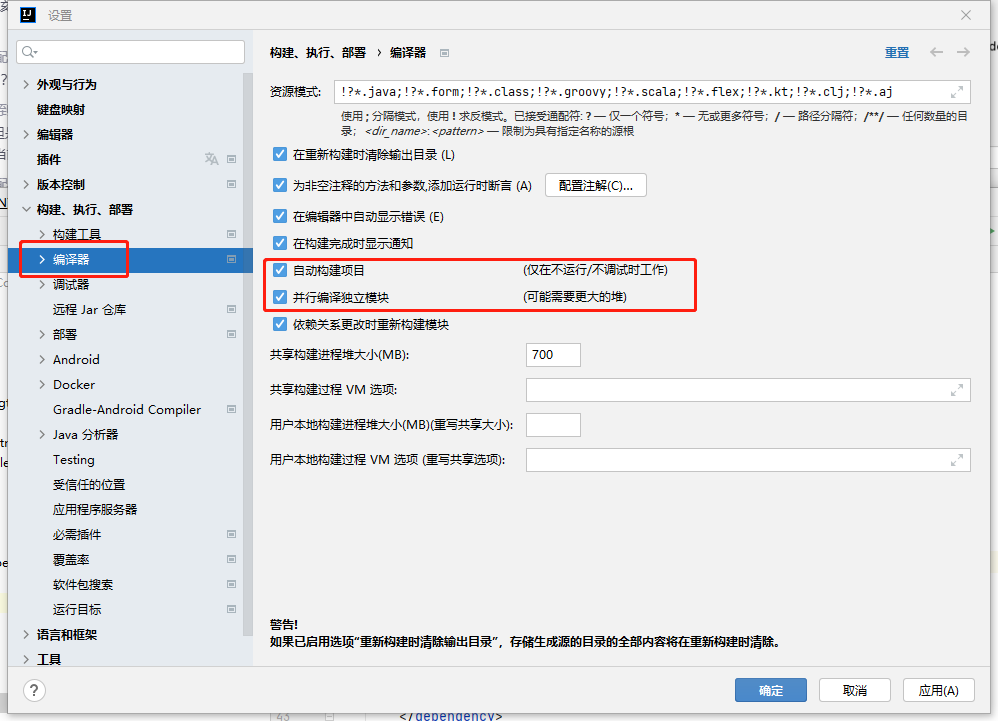
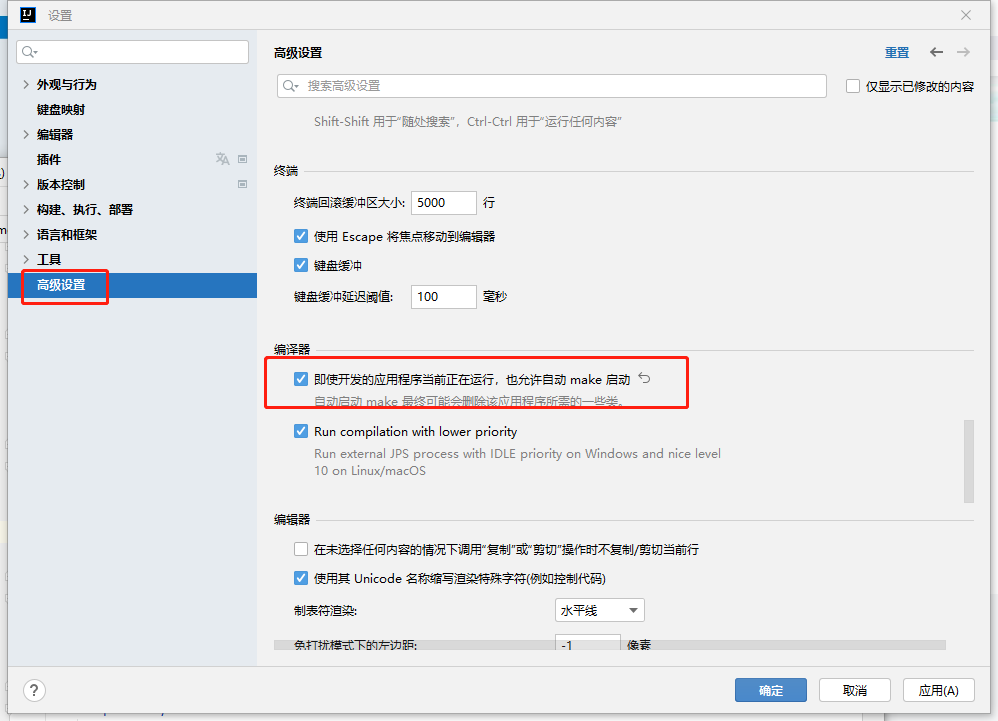
点击应用然后确定即可。
现在测试下修改代码无须重启即可看到更改结果了。
文本来源: