PHP CI 分页之Bootstrap
之前的文章只是简单的使用CI框架生成一个分页,没有CSS,JS等,本文将在之前的基础上再添加Bootstrap对分页进行构建
本文使用Bootstap 4.3.1
准备工作
下载以下工具
Bootstrap v4.3.1
jQuery v3.3.1
Popper.js v1.14.7 (bootstrap.bundle.js已经包含)
在网站根目录下创建static目录,将下载的工具放到此目录下,结构
static
  |
  |
  |---css
  |    |
  |    |--bootstrap.css
  |
  |---js
  |    |
  |    |---bootstrap.bundle.js
  |    |---bootstrap.js
  |
  |---jquery
        |
        |---jquery-3.3.1.js
在页面中使用Bootstrap
在head标签中添加CSS
<head>
...
<link href="<?php echo base_url();?>static/css/bootstrap.css" rel="stylesheet">

<!--自定义的CSS-->
<link href="<?php echo base_url();?>static/css/style.css" rel="stylesheet">
...
</head>在页面最后body标签之前添加JS
...
<script src="<?php echo base_url();?>static/jquery/jquery-3.3.1.js"></script>
<script src="<?php echo base_url();?>static/js/bootstrap.js"></script>

<!--自定义的JS-->
<script src="<?php echo base_url();?>static/js/scripts.js"></script>
</body>
添加样式
Container容器
Container容器是窗口布局的最基本元素,我们推荐所有样式都定义在.container或.container-fluid容器之中-- 这是启用整个栅格系统必不可少的前置条件,它们分别对应选择一个响应式的、固定宽度的容器,或者选择一个流式自适应浏览器或容器最大合法宽度的窗口(意味着任何时候它的宽度总是100%)。
.container容器可以被嵌套,但是大多数布局并不需要这么做(最少层次的嵌套构建出的网页更优雅-译者注),其呈现效果和使用方法如下所示:

示例:
<div class="container">
  <!-- Content here -->
</div>
Border
使用 border快速定义边框和边框阴影和边框圆角
示例:

<span class="border"></span>
<span class="border-top"></span>
<span class="border-right"></span>
<span class="border-bottom"></span>
<span class="border-left"></span>
Border-radius

<img src="..." alt="..." class="rounded">
<img src="..." alt="..." class="rounded-top">
<img src="..." alt="..." class="rounded-right">
<img src="..." alt="..." class="rounded-bottom">
<img src="..." alt="..." class="rounded-left">
<img src="..." alt="..." class="rounded-circle">
<img src="..." alt="..." class="rounded-0">
Shadow
使用shadow快速定义阴影
示例:
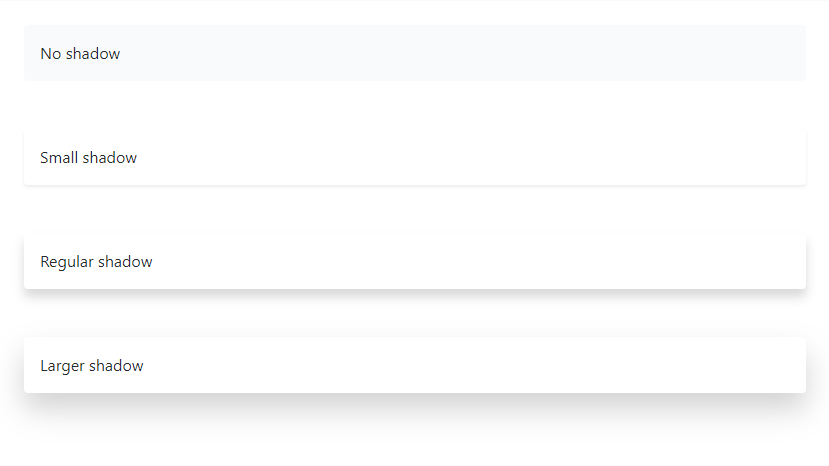
<div class="shadow-none p-3 mb-5 bg-light rounded">No shadow</div>
<div class="shadow-sm p-3 mb-5 bg-white rounded">Small shadow</div>
<div class="shadow p-3 mb-5 bg-white rounded">Regular shadow</div>
<div class="shadow-lg p-3 mb-5 bg-white rounded">Larger shadow</div>
Hoverable rows
使用table-hover来定义行悬浮样式
示例:
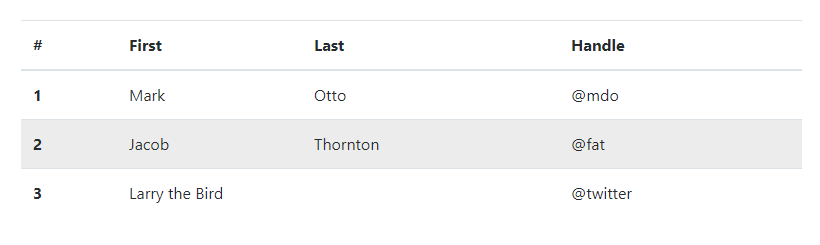
<table class="table table-hover">
  <thead>
    <tr>
      <th scope="col">#</th>
      <th scope="col">First</th>
      <th scope="col">Last</th>
      <th scope="col">Handle</th>
    </tr>
  </thead>
以上就是针对表格的整体显示样式,最终的效果:
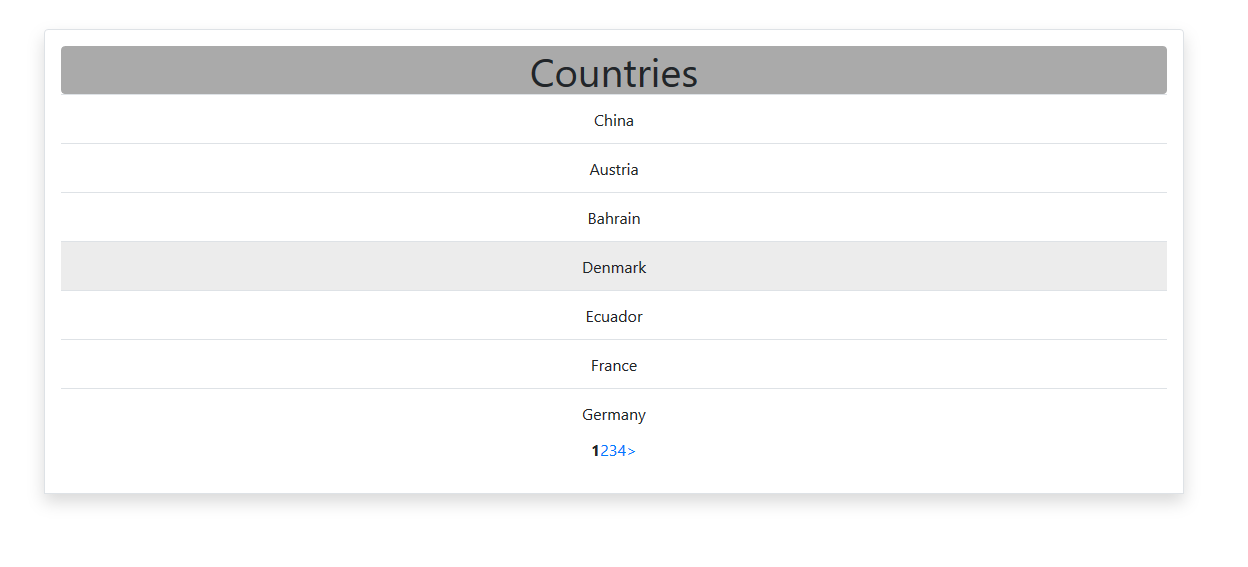
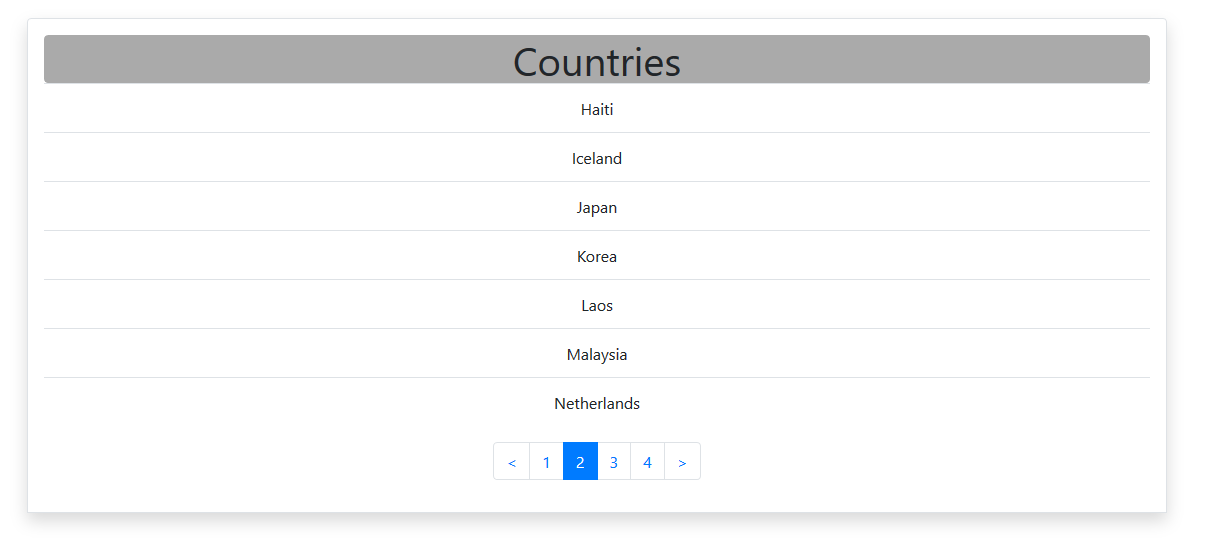
CI Pagination 类配置
详细资料请参考中文官方文档:分页类
代码如下:
// Bootstrap 分页样式
$config['full_tag_open'] = '<div><ul class="pagination justify-content-center">';
$config['full_tag_close'] = '</ul></div>';
$config['first_tag_open'] = '<li class="page-item">';
$config['first_tag_close'] = '</li>';
$config['last_tag_open'] = '<li class="page-item">';
$config['last_tag_close'] = '</li>';
$config['num_tag_open'] = '<li class="page-item">';
$config['num_tag_close'] = '</li>';
$config['prev_tag_open'] = '<li class="page-item">';
$config['prev_tag_close'] = '</li>';
$config['next_tag_open'] = '<li class="page-item">';
$config['next_tag_close'] = '</li>';
$config['cur_tag_open'] = '<li class="page-item active"><a class="page-link" href="#">';
$config['cur_tag_close'] = '</a></li>';
$config['attributes'] = array('class' => 'page-link');
其中有两个地方要注意:
一个是,justify-content-center,因为Bootstrap默认的分页样式是左对齐的,需要添加这个来使内容居中,也就是整个分页部分居中。另一个是,$config['cur_tag_open'] = '<li class="page-item active"><a class="page-link" href="#">';,因为CI框架在生成分页的时候,当前页是没有<a>标签的,只有<strong>,所以要构建一个<a>标签
最终的显示